Controlling the amount of the photo that is in focus is one of the photographer’s best tools to help draw the viewer’s eye where you want it. For example, landscapes are typically shot so that everything is in focus, so photographers will shoot at small lens apertures.
Sunday, 1 December 2019, December 01, 2019 - Permalink | 8 Comments
EXPOSURE
“Exposure” refers to the brightness in a picture as decided by the interaction between aperture and shutter speed
The word “exposure” refers to the
volume of light taken in at the instant the picture is taken, which affects the
brightness of the resulting image. This volume of light is essentially decided
by the combination of the aperture and shutter speed settings.
DSLR cameras are equipped with an
automatic exposure (AE) function. Therefore, under normal conditions where the
ISO speed is constant, you don’t have to think about which aperture and shutter
speed setting will give you the adequate exposure as it will be automatically
set by the camera. We can get good results with all sorts of scenes and
subjects with this automatically-set exposure, which we call the “correct
exposure”.
However, correct exposure may not
be the optimal exposure for the scene, as depending on the condition of the
scene and the subject, there are times where the brightness of the scene does
not turn out as we would like it to be. When this happens, we can always make
use of the exposure compensation feature to adjust the brightness level. When
we want the image to look be darker, we can set a negative (“-“) exposure
compensation value. If we want a brighter image, we can set a positive (“+”)
value.
Even when taking pictures of the
same situation or the same subject, a simple adjustment to the exposure can
give you very different results. In other words, the art of exposure
compensation is something we must all learn in taking a good picture.
Concept 1: Exposure results from interaction between aperture and shutter speed
Using either of the following
combinations would result in the same level of brightness:
1. Larger aperture (smaller
f-number) + faster shutter speed 2. Smaller aperture (larger
f-number) + slower shutter speed
Look at examples (3), (5) and (7)
below. They are the results of a different combination of shutter speed and
aperture. But you see the same brightness (exposure) in the pictures.
Examples (3), (5) and (7) are all
of the same brightness (correct exposure)
Example (1) is overexposed
Example (9) is underexposed
Concept 2: The auto exposure (AE) functions
Take a look at the chart below. It
shows clearly how there are a few patterns to the combination of aperture and
shutter speed. You might find it difficult to decide on which combination to
pick. However, a digital camera is equipped with some very convenient automatic
exposure (AE) functions that simplifies the process.


There is “Program AE mode” [ P ]
mode )where the camera automatically sets both aperture and shutter speed;
“Shutter-priority AE” [ Tv ] mode, where you set the shutter speed and the
camera decides the aperture; and “Aperture-priority AE” [ Av ] mode where you
set the aperture and the camera decides the shutter speed.
When you’ve set your camera to any of these modes, all you need to do is release the shutter and you will get an image with the appropriate exposure. Convenient and hassle-free!
APERTURE
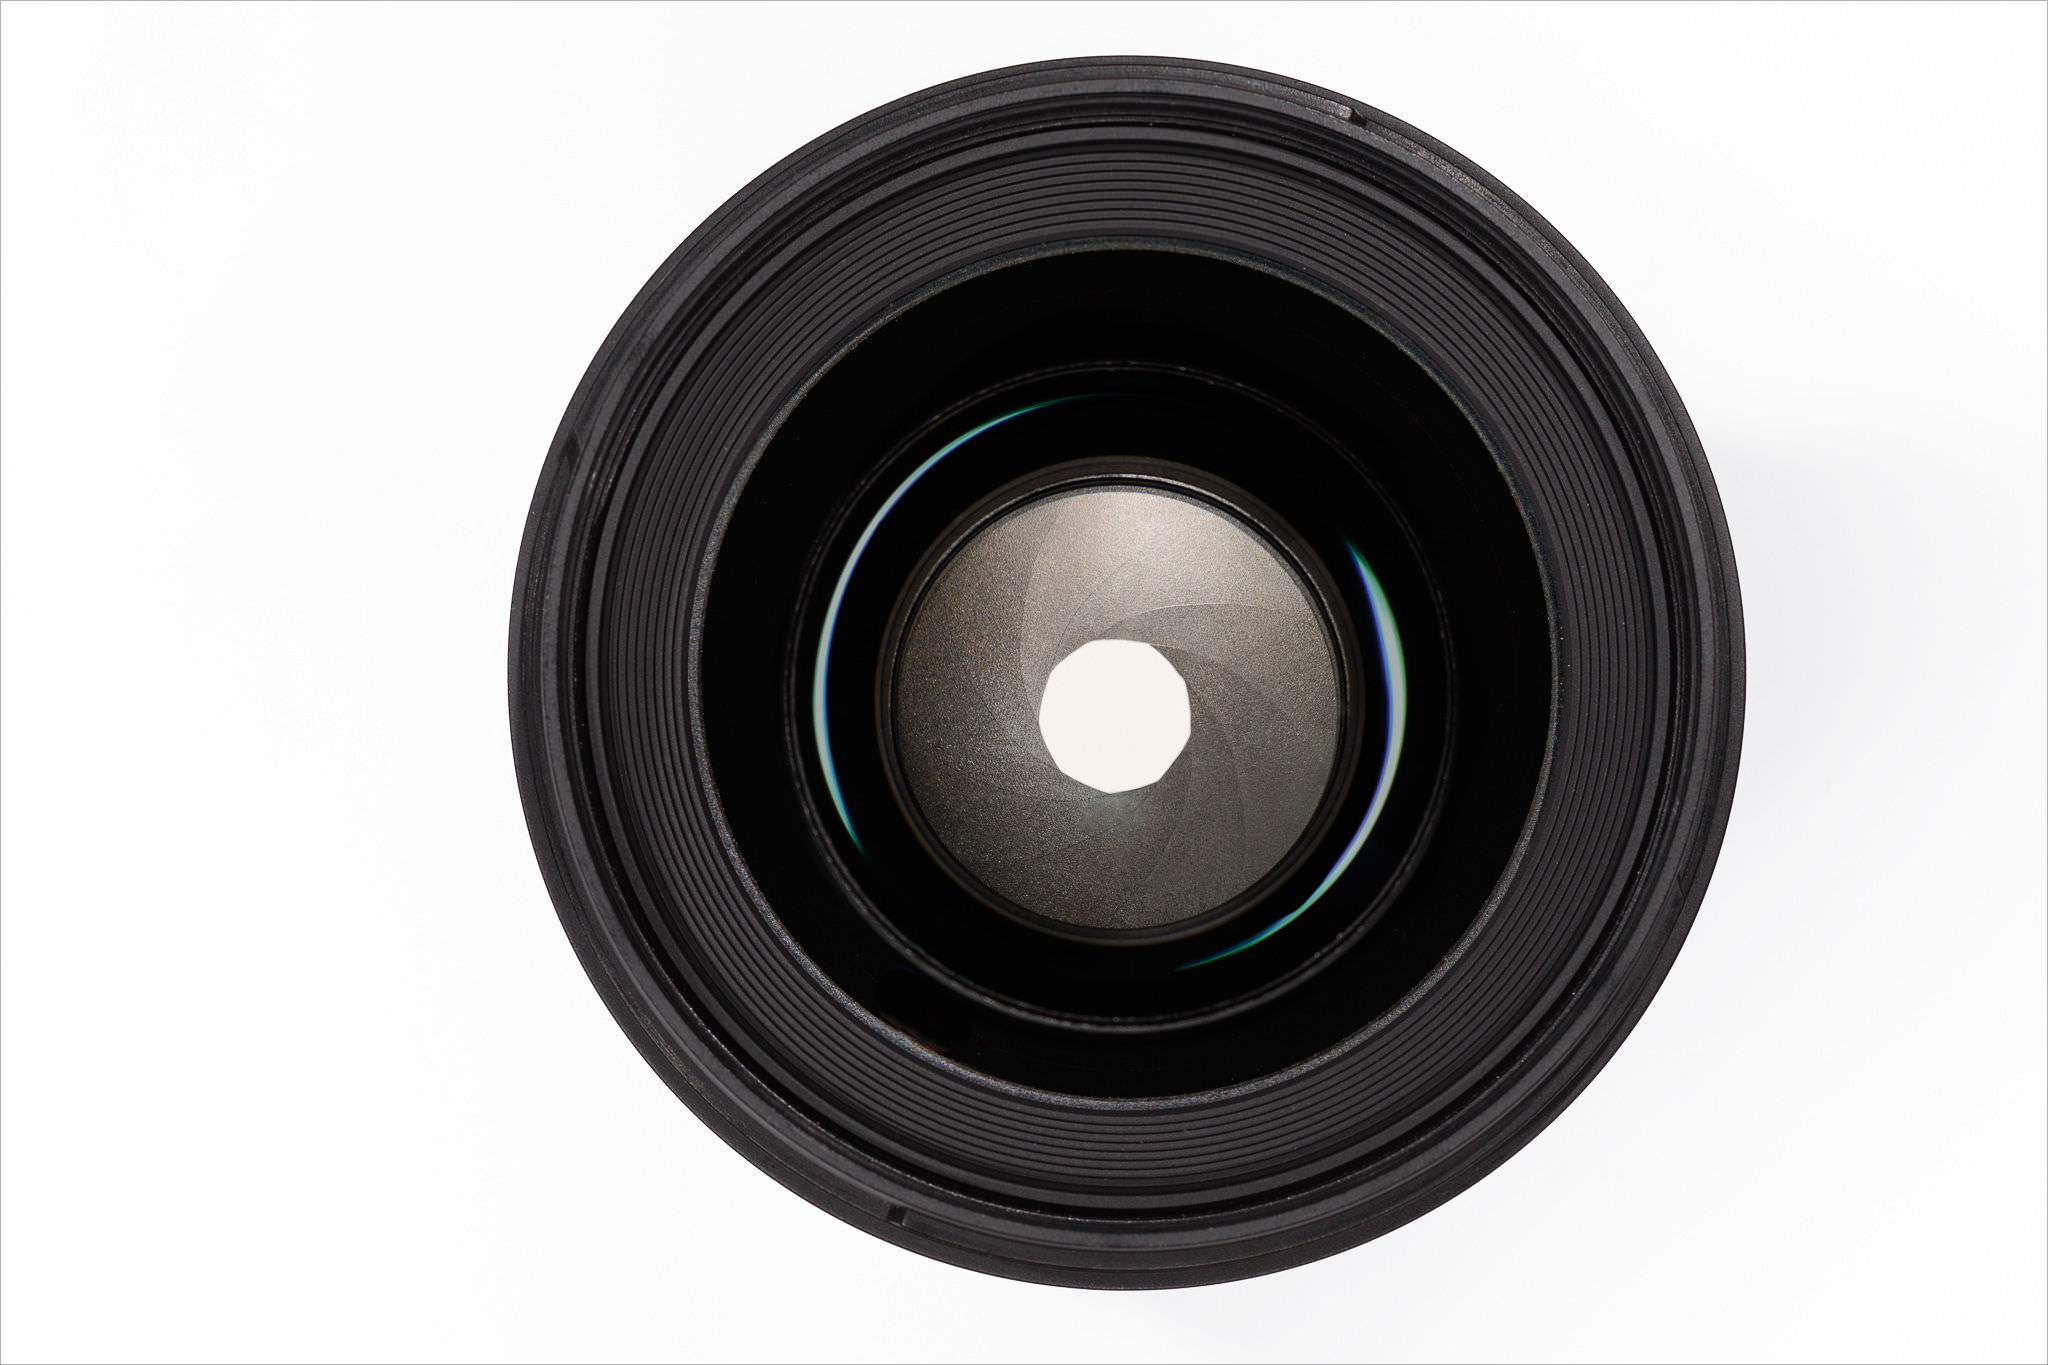
Aperture is one of the three pillars of photography (the other two being Shutter Speed and ISO), and certainly the most important. Aperture can be defined as the opening in a lens through which light passes to enter the camera. It is an easy concept to understand if you just think about how your eyes work. As you move between bright and dark environments, the iris in your eyes either expands or shrinks, controlling the size of your pupil.
In photography, the “pupil” of
your lens is called aperture. You can shrink or enlarge the size of the
aperture to allow more or less light to reach your camera sensor. The image
below shows an aperture in a lens:
Aperture can add dimension to your photos by controlling depth of field. At one extreme, aperture gives you a blurred background with a beautiful shallow focus effect.
At the other, it will give you sharp photos from the nearby foreground to the distant horizon. On top of that, it also alters the exposure of your images by making them brighter or darker.
How Aperture Affects Exposure
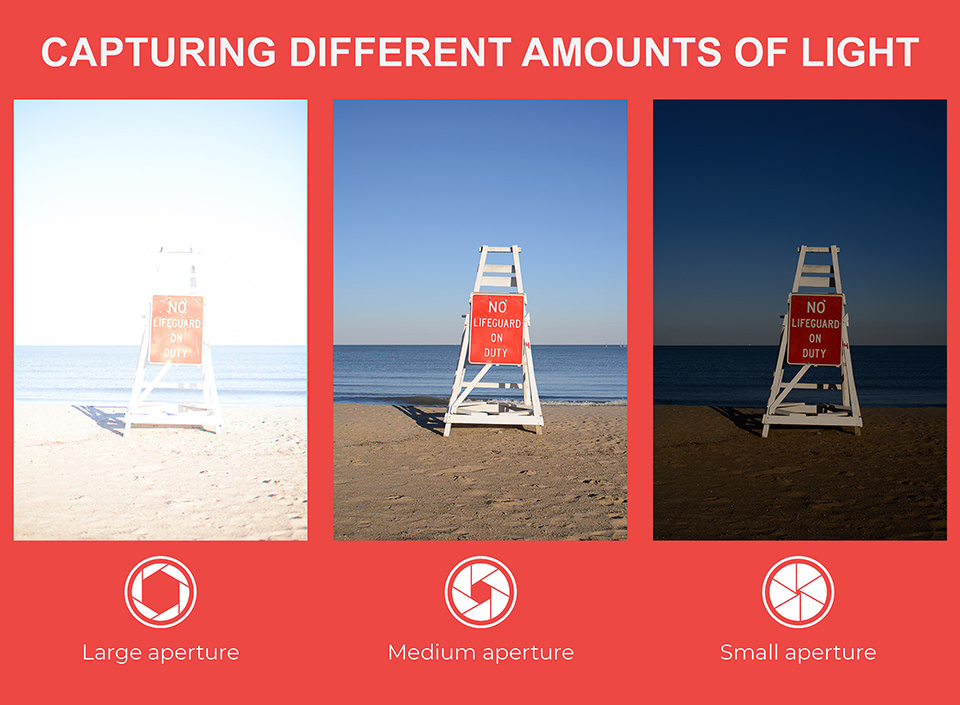
Aperture has several effects on your photographs. One of the most important is the brightness, or exposure, of your images. As aperture changes in size, it alters the overall amount of light that reaches your camera sensor – and therefore the brightness of your image.
A large aperture (a wide opening) will pass a lot of light, resulting in a brighter photograph. A small aperture does just the opposite, making a photo darker. Take a look at the illustration below to see how it affects exposure:
How Aperture Affects Depth of Field
The other critical effect of aperture is depth of field. Depth of field is the amount of your photograph that appears sharp from front to back. Some images have a “thin” or “shallow” depth of field, where the background is completely out of focus. Other images have a “large” or “deep” depth of field, where both the foreground and background are sharp.
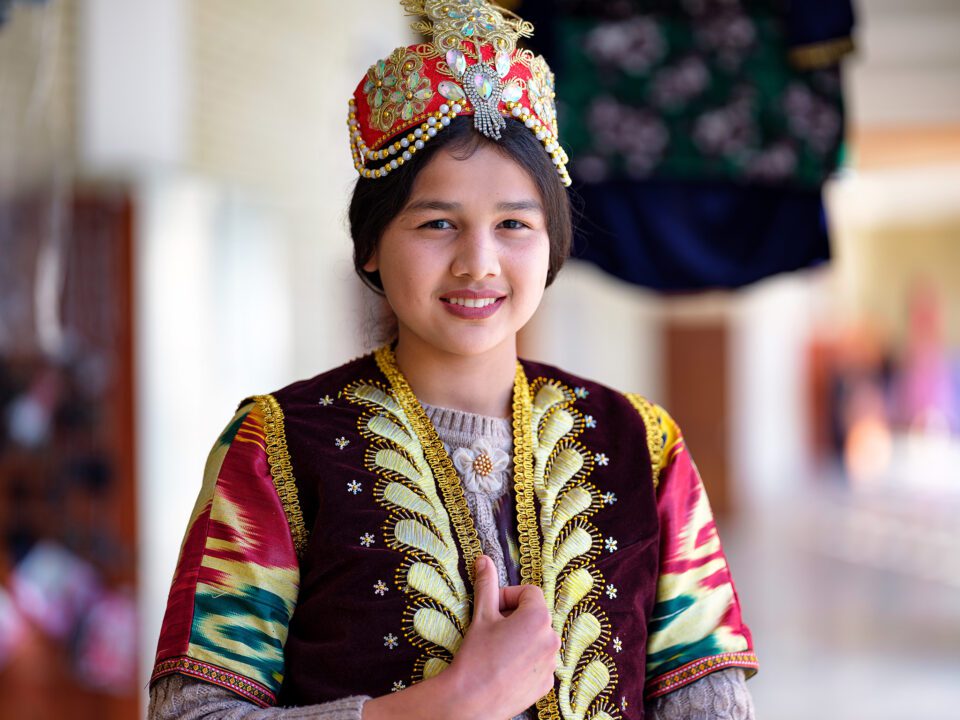
In the image above, you can see that the girl is in focus and appears sharp, while the background is completely out of focus. The choice of aperture played a big role here. I specifically used a large aperture in order to create a shallow focus effect. This helped me bring the attention of the viewer to the subject, rather than busy background. If I had chosen a much smaller aperture, I would not have been able to separate my subject from the background as effectively.
Examples of Aperture Use
Now that we have gone through a thorough explanation of how aperture works and how it affects your images, let’s take a look at examples at different f-stops.
- f/0.95 – f/1.4 – such “fast” maximum apertures are only available on premium prime lenses, allowing them to gather as much light as possible. This makes them ideal for any kind of low-light photography when photographing indoors (such as photographing the night sky, wedding receptions, portraits in dimly-lit rooms, corporate events, etc). With such wide f-stops, you will get very shallow depth of field at close distances, where the subject will appear separated from the background.
- f/1.8 – f/2.0 – some enthusiast-grade prime lenses are limited to f/1.8 and offer slightly inferior low-light capabilities. Still, if your purpose is to yield aesthetically-pleasing images, these lenses be of tremendous value. Shooting between f/1.8 and f/2 typically gets adequate depth of field for subjects at close distances while still yielding pleasant bokeh.
- f/2.8 – f/4 – most enthusiast and professional-grade zoom lenses are limited to f/2.8 to f/4 f-stop range. While they are not as capable as f/1.4 lenses in terms of light-gathering capabilities, they often provide image stabilization benefits that can make them versatile, even when shooting in low-light conditions. Stopping down to the f/2.8 – f/4 range often provides adequate depth of field for most subjects and yields superb sharpness. Such apertures are great for travel, sports, wildlife, as well as other types of photography.
- f/5.6 – f/8 – this is the ideal range for landscape and architecture photography. It could also be a good range for photographing large groups of people. Stopping down lenses to the f/5.6 range often provides the best overall sharpness for most lenses and f/8 is used if more depth of field is required.
- f/11 – f/16 – typically used for photographing landscape, architecture and macro photography where as much depth of field as possible is needed. Be careful when stopping down beyond f/8, as you will start losing sharpness due to the effect of lens diffraction.
- f/22 and Smaller – only shoot at such small f-stops if you know what you are doing. Sharpness suffers greatly at f/22 and smaller apertures, so you should avoid using them when possible. If you need to get more depth of field, it is best to move away from your subject or use a focus stacking technique instead.
SHUTTER SPEED
One of the three most important settings in photography is Shutter Speed, the other two being Aperture and ISO. Shutter speed is responsible for two particular things: changing the brightness of your photo, and creating dramatic effects by either freezing action or blurring motion. In the following article, we will explain everything you need to know about it in very simple language.
Shutter speed exists because of camera shutter – which is a curtain in front of the camera sensor that stays closed until the camera fires. When the camera fires, the shutter opens and fully exposes the camera sensor to the light that has passed through your lens. After the sensor is done collecting the light, the shutter closes immediately, stopping the light from hitting the sensor. The button that fires the camera is also called “shutter” or “shutter button,” because it triggers the shutter to open and close.
Shutter speed is the length of time camera shutter is open, exposing light onto the camera sensor. Essentially, it’s how long your camera spends taking a photo. This has a few important effects in how your images will appear.
When you use a long shutter speed, you end up exposing your sensor for a significant period of time. The first big effect of it is motion blur. If your shutter speed is long, moving subjects in your photo will appear blurred along the direction of motion. This effect is used quite often in advertisements of cars and motorbikes, where a sense of speed and motion is communicated to the viewer by intentionally blurring the moving wheels.
Slow shutter speeds are also used to photograph the Milky Way or other objects at night, or in dim environments with a tripod. Landscape photographers may intentionally use long shutter speeds to create a sense of motion on rivers and waterfalls, while keeping everything else completely sharp. On the other hand, shutter speed can also be used to do just the opposite – freeze motion. If you use an especially fast shutter speed, you can eliminate motion even from fast-moving objects, like birds in flight, or cars driving past. If you use a fast shutter speed while taking pictures of a water, each droplet will hang in the air completely sharp, which might not even be visible to our own eyes.

All of the above is achieved by simply controlling the shutter speed. In summary, quick shutter speeds freeze action, while long ones create an effect of motion when you photograph moving objects.
COMPOSITION

Composition in photography can be defined as positioning the objects in the frame in such a way that the viewer’s eye is automatically drawn to the most interesting or significant area of the capture.
Arranging elements can be done by actually moving the objects or subjects. A good example for this case is portrait or still life photography. Street photography involves anticipation, since the photographer doesn’t usually have the choice of moving his subjects himself, but has to wait for them to take the most suitable position within the frame. Another way of arranging elements is by changing your own position. Such a way is appropriate in circumstances that do not allow the photographer to physically move anything, like landscape photography.
Composition is a way of guiding the viewer’s eye towards the most important elements of your work, sometimes – in a very specific order. A good composition can help make a masterpiece even out of the dullest objects and subjects in the plainest of environments. On the other hand, a bad composition can ruin a photograph completely, despite how interesting the subject may be.
A poorly judged composition is also not something you can usually fix in post-processing, unlike simple and common exposure or white balance errors. Cropping can sometimes save an image, but only when tighter framing and removal of certain portions of the image is the correct solution. That is why giving your choice of composition plenty of thought before capturing an image is a step of utmost importance.
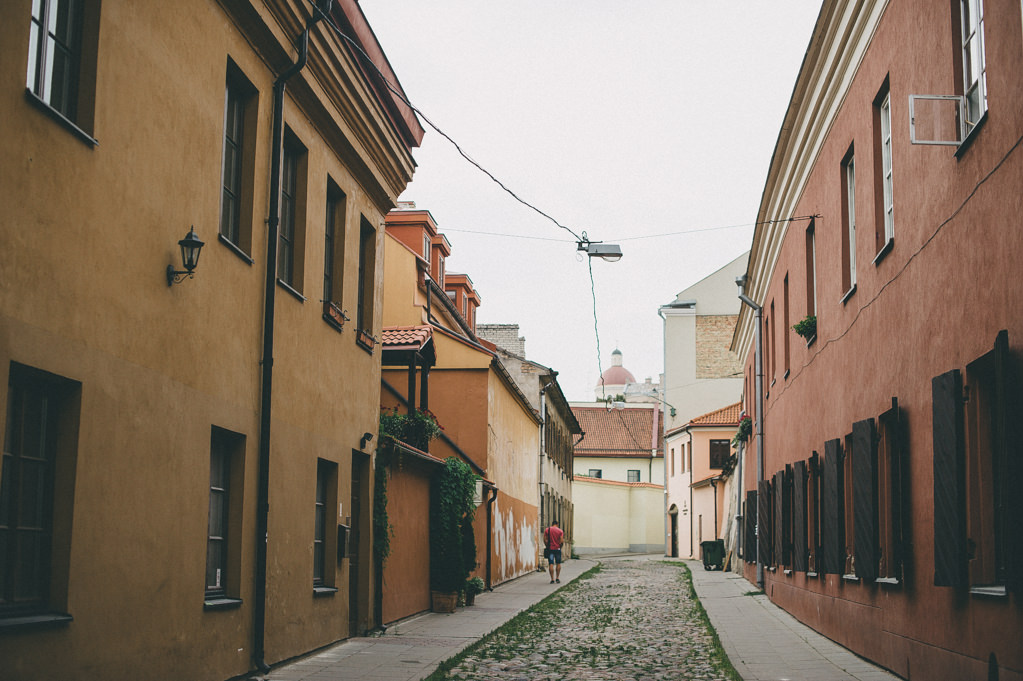
Focal length, aperture, angle at which you choose to position your camera relative to your subject also greatly affects composition. For example, choosing a wider aperture will blur the background and foreground, effectively lessening the importance of objects placed in there. It will also more often than not result in more noticeable corner shading (vignetting), which will help keep viewer’s eye inside the frame for longer.
On the other hand, closing down the aperture will bring more objects into focus which, in turn, may result in better image balance. How so? Well, “sharper”, more in-focus objects may attract more attention than a blurry shape, but not always (see image sample below). An experienced photographer will use all the available means to achieve the desired result. It is worth noting that de-focusing objects in the foreground or background does not negate their contribution to overall composition of the image. Simple shapes, tones, shadows, highlights, colors are all strong elements of composition.
RULE OF THIRDS

The rule of thirds is one of the most useful composition techniques in photography. It's an important concept to learn as it can be used in all types of photography to produce images which are more engaging and better balanced.
Of course, rules should never be applied blindly, particularly in art, so you should think of it more as a handy "rule of thumb" rather than one that's set in stone. However, it will produce a pleasing photo more often than not, and is an excellent starting point for any composition.
WHAT IS THE RULE OF THIRDS?
The rule of thirds involves mentally dividing up your image using 2 horizontal lines and 2 vertical lines, as shown below. You then position the important elements in your scene along those lines, or at the points where they meet.
 |
| A rule of thirds grid. Important elements (the shed, and the border between the ground and the trees) are positioned along the lines and at the intersections
The idea is that an off-centre composition is more pleasing to the eye and looks more natural than one where the subject is placed right in the middle of the frame. It also encourages you to make creative use of negative space, the empty areas around your subject.
HOW TO USE THE RULE OF THIRDS
When framing a photo, imagine the scene divided up as above. Think about what elements of the photo are most important, and try to position them at or near the lines and intersections of the grid. They don't have to be perfectly lined up as long as they're close.
|

You may need to move around to get the best composition. This forces you to think more carefully about the shot, and is a good habit to get into whether you're using the rule of thirds or not. To help you out, some cameras have a setting which overlays a rule of thirds grid onto your photo. This removes all guesswork and helps you get your positioning even more accurate.
DEPTH OF FIELD
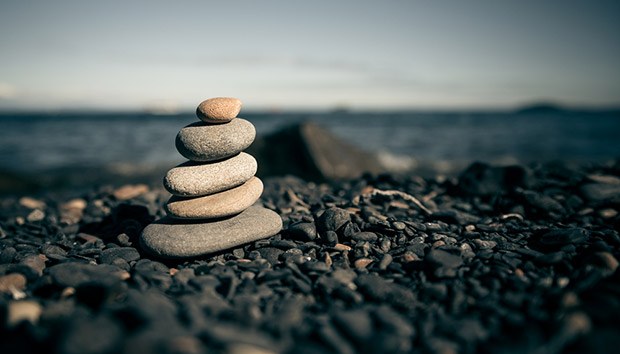
What is Depth of Field?
Depth of field is the distance between the closest and farthest objects in a photo that appears acceptably sharp. Now your camera can only focus sharply at one point. But the transition from sharp to unsharp is gradual, and the term ‘acceptably sharp’ is a loose one! Without getting too technical, how you will be viewing the image, and at what size you will be looking at it are factors which contribute to how acceptably sharp an image is. It also depends on how good your vision is. In simplest terms, depth of field is how much of your image is in focus. In more technical terms, depth of field is the distance in an image where objects appear “acceptably in focus” or have a level of “acceptable sharpness.”
Why Use Depth of Field in Photography?
However, you can create layering in your image by having only part of the photo in focus. If you have some foreground objects out of focus (for example, some leaves), they will give your image depth; the viewer will really feel like they’re looking through those leaves at your main subject. To achieve this effect, shoot at a wider lens aperture.
What Factors Affect Depth of Field?
A few different factors affect depth of field in digital photography, regardless of whether you’re using a DSLR camera or a smartphone. These factors are: focal length, aperture, camera-subject distance, and sensor size.
6 Examples of Depth of Field in Photography
- Macro. Macro photography is when you take photos of very small things in a larger-than-life size. So, for example, a large photo of an insect. In macro photography, you’re going to use a very shallow depth of field. Try an aperture of f/2.8, f/4 or f/5.6. You’ll also want to your camera-subject distance to be very small. You’ll also want a longer focal length and for your focus point to be very close to your camera.
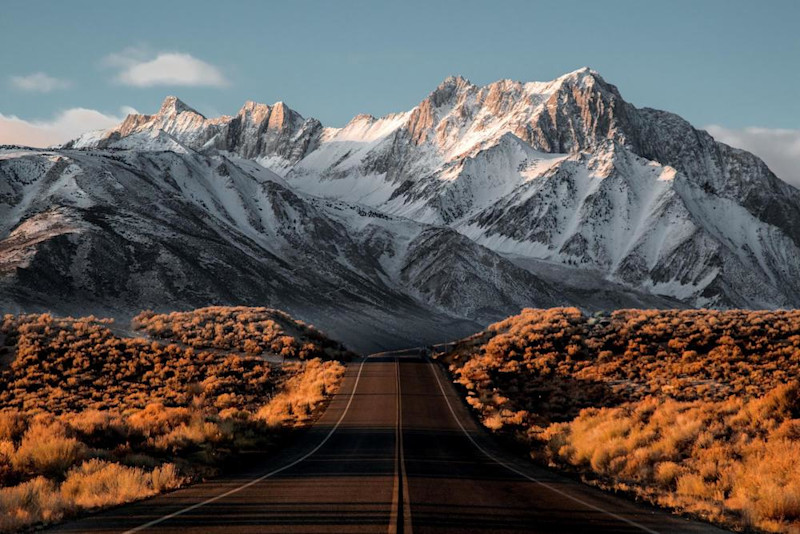
- Deep. A large or deep depth of field will put a longer distance into focus. Landscape photography is a good example of a large or deep depth of field. In order to achieve a large or deep depth of field, you want a smaller aperture, which means the larger F-stops, i.e. a maximum aperture of f/22. Additionally, you’ll need a shorter focal length and to be further away from your subject.
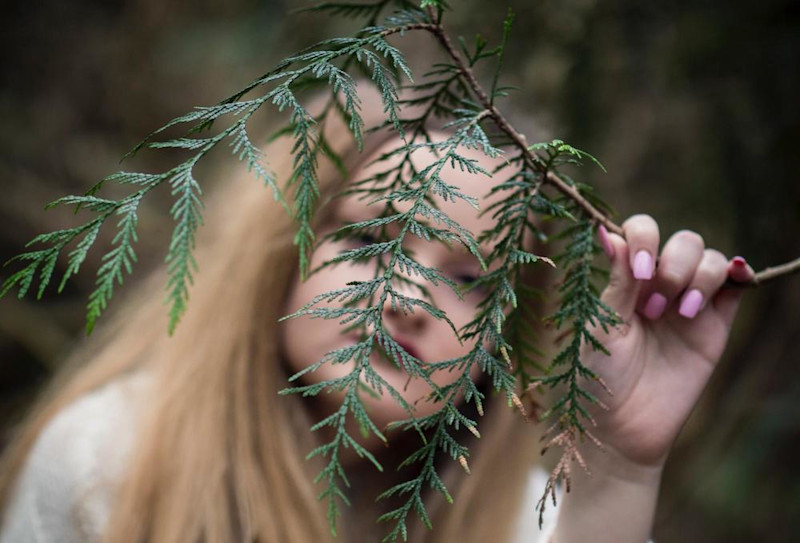
- Shallow. A shallow depth of field is good for focusing on an option that closer to your camera. For example, a close up of bee hovering over a flower would require a shallow depth of field. In order to achieve a shallow depth of field, you want a large aperture, which means the smaller F-stops, i.e. f/2.8. Go with a longer focal length and stand relatively close to your subject
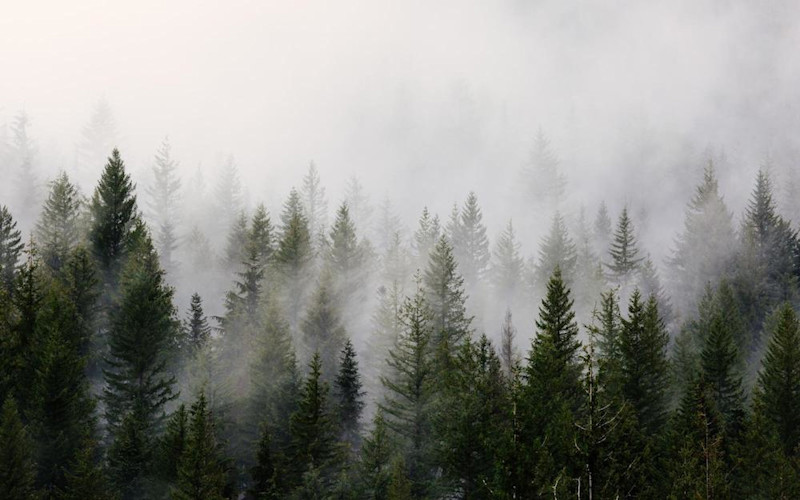
- Landscape. Because landscapes have a very large depth of field—you want basically everything to be in focus—you want a smaller aperture. As you know, that means larger F-stops. Try f/22 and adjust from there. You’ll need a shorter focal length and to be far away from your subject.
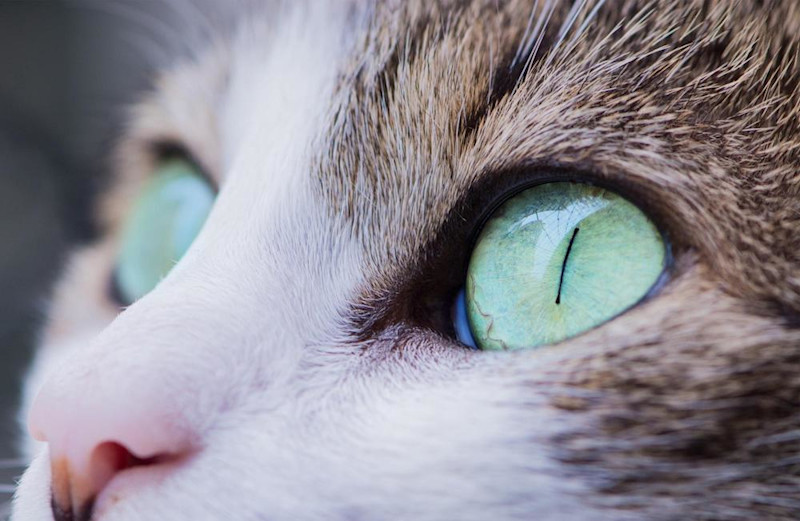
- Close-up. For a close-up photograph, you want a shallow depth of field. That means a larger aperture or smaller F-stop. It also means a longer focal length and that your camera-subject distance needs to be short.
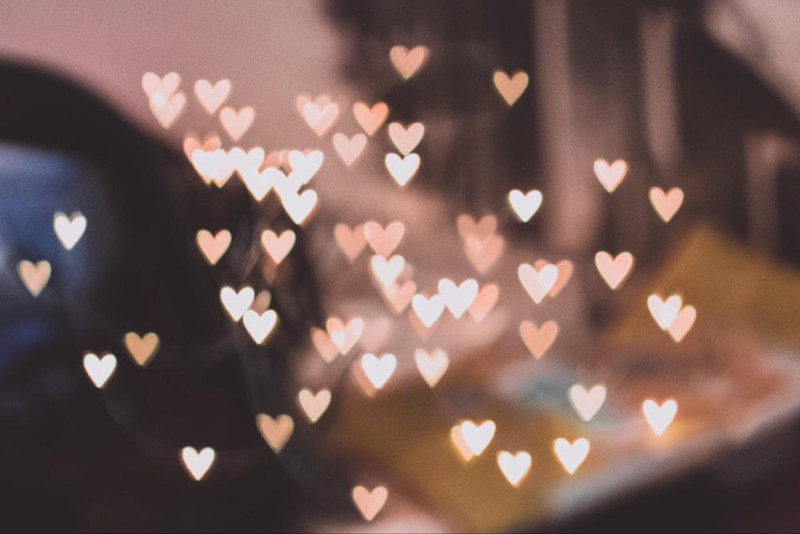
- Bokeh. Bokeh is one popular photography method that utilizes depth of field. When shooting bokeh, set your lens to the lowest aperture.
BALANCE
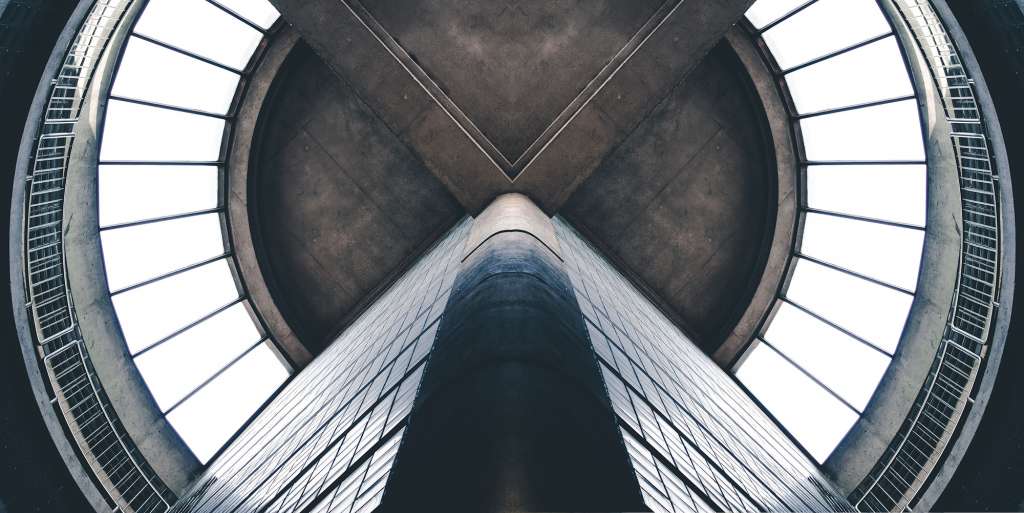
Balance in photography is observed when an image has subject areas that look balanced throughout the composition. It is achieved by shifting the frame and juxtaposing subjects within it so objects, tones, and colors are of equal visual weight. An image is balanced when subject areas command a viewer’s attention equally. There are two main techniques of balance: formal and informal. However, there are also other kinds of formal and informal techniques that photographers have been practicing to balance out lightness and heaviness, varying shapes, and even meanings behind a composition.
Symmetrical Balance
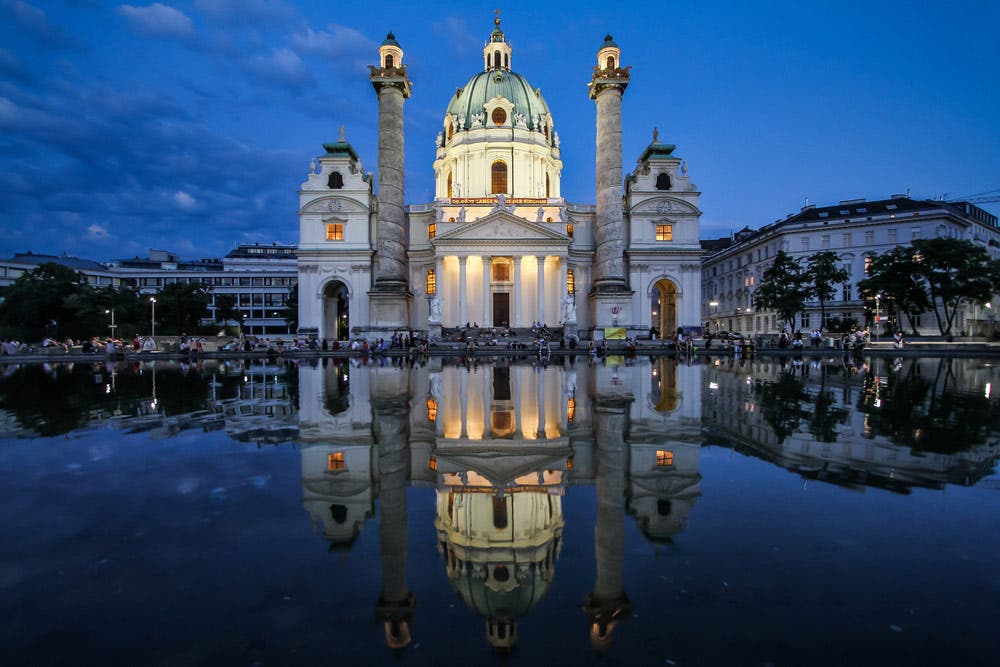
Also called formal balance, symmetrical balance is the most common way to photograph an image. After all, it’s natural for for people to place their main subjects right in the middle of the frame. Professionals and photography workshops often advise new photographers to avoid shooting their subjects front and center, but in the case of the photo above, it works perfectly in giving the main subject some visual emphasis and appeal.
In symmetrically balanced photos, both sides of the frame have equal weight and may even mirror each other. Subjects are intentionally centered to look perfectly symmetrical when split horizontally or vertically in half.
Asymmetrical Balance
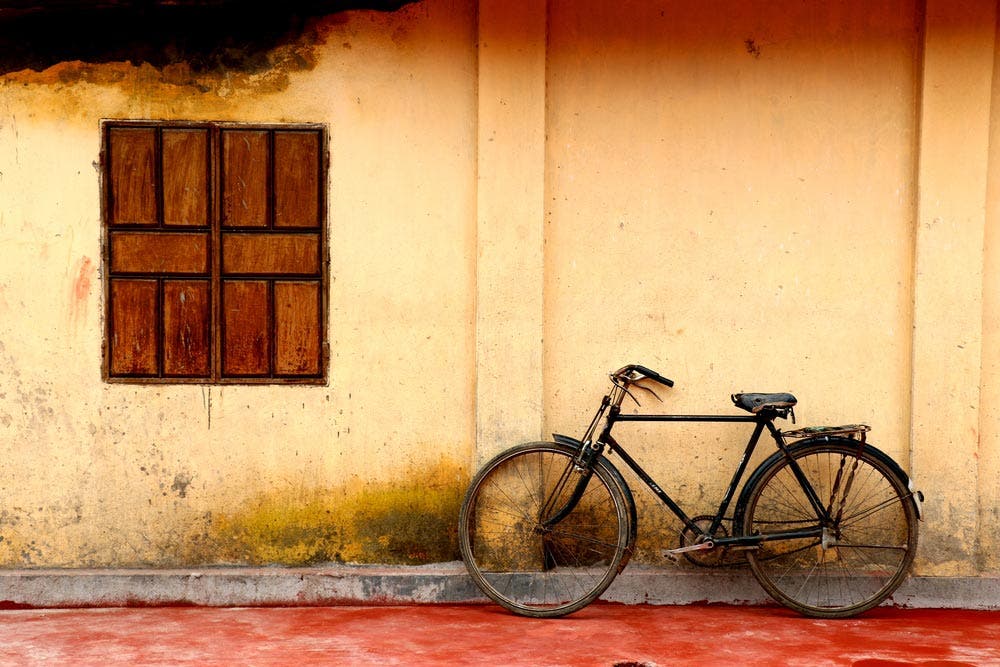
Also known as informal balance, it is the most common compositional technique taught in photography and art workshops. Since it requires intentionally placing your subject off center, it’s more difficult to achieve but gets easier with daily practice.
The rule of thirds puts asymmetrical balance to your advantage, as it suggests that the center of interest lies along the intersecting lines of an image that is divided vertically and horizontally by four lines. Other ways to create asymmetrical balance within the composition is by balancing out your main subject with another, less important subject that contrasts with the former in terms of size, color, or general appearance.
Take the image of the window and bike above. Not only are the subjects placed on the left and right side of the frame, they compliment each other by varying in size, thus creating balance in both size and subject placement.
Color Balance

Another interesting way to create asymmetrical balance is by using colors. As you can imagine, a photo with too many vibrant colors, such as reds and oranges, may make an image look overwhelming. Color balance can be achieved by balancing out a small area of vibrant color with a larger area of neutral or more pastel colors, and vice versa.
In the image above, the rainbow-colored abacus beads would have been too heavy on the eyes if it were placed on a colored surface instead of a plain, white surface. Both images below were placed off center and are not balanced out by a second subject, but are balanced out by more neutral and less striking colors around them.
Tonal Balance
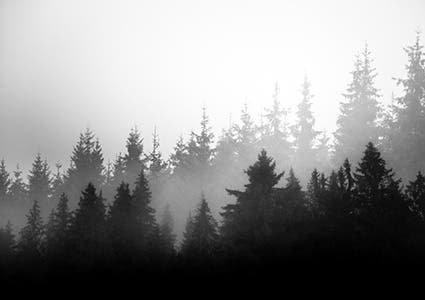
This kind of asymmetrical balance is best observed in monochromatic or black and white images where different tones are easily distinguishable. In this case, tonal balance is seen in terms of contrast between lighter and darker areas within an image.
Like bright colors, darker areas are “heavier” on the eyes and are best balanced out by bigger, lighter areas. These are observed in the photos below, where the foregrounds are darker and are in harmony with the lighter backgrounds. The fact that the foreground subjects also observe the rule of thirds adds even more visual appeal to the images.
Conceptual Balance
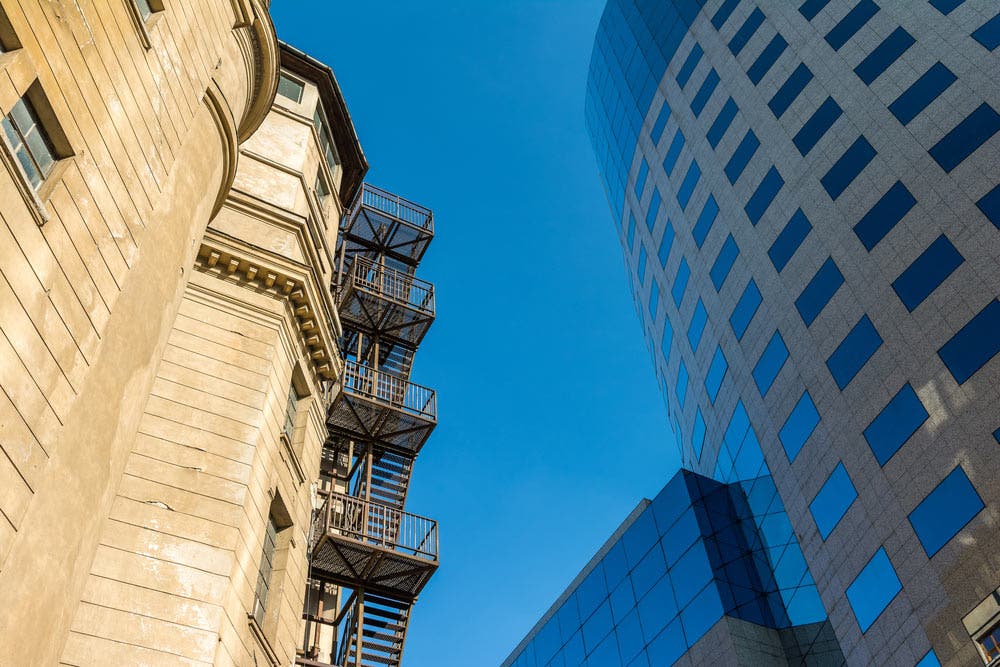
Conceptual balance is the more philosophical type of asymmetrical balance where two subjects complement each other and are different beyond size, shape and form. In many cases, conceptual balance is achieved in an image where there are two contrasting textures or meanings behind its subjects. That said, it is obviously harder to compose a conceptually balanced image as it usually takes more than just a tilt of the frame.
In the photo above, the two subjects (an old building and a high-rise glass building) are placed on the left and right sides of the frame. In addition to asymmetrical, color, and tonal balance, conceptual balance is achieved as the buildings showcase the effect of modernization and industrialization.


